Essastone benchtops: practical choices that make the install smoother
Essastone benchtops: practical choices that make the install smoother
If you want an Essastone benchtop that looks great and installs with fewer surprises, decide these four things early: colour, thickness, joins, and cut-outs. Lock them in before templating and the rest of the job is usually simpler.
This guide focuses on what matters on site for homes across the Gold Coast, Brisbane and South East Queensland.
Quick answers (what most people ask first)
Edge profiles change the look and feel more than most people expect.
- Colours: choose undertone (warm/cool), match the busiest visual element (often flooring or splashback), then pick veining level (low/medium/high).
- 20mm vs 40mm look: 20mm suits modern kitchens and tighter budgets. The “40mm look” is usually a 20mm top with a built-up or mitred edge.
- Biggest price drivers: waterfalls, mitres, splashbacks, cut-outs, access, and the number/position of joins.
- Less noticeable joins: plan seam locations early and avoid patterns/finishes that highlight joins.
If you’re comparing brands (Caesarstone, Smartstone, Stone Ambassador), the decision points are similar. The main differences are usually the exact colour/finish you want and whether it’s available when you need it.
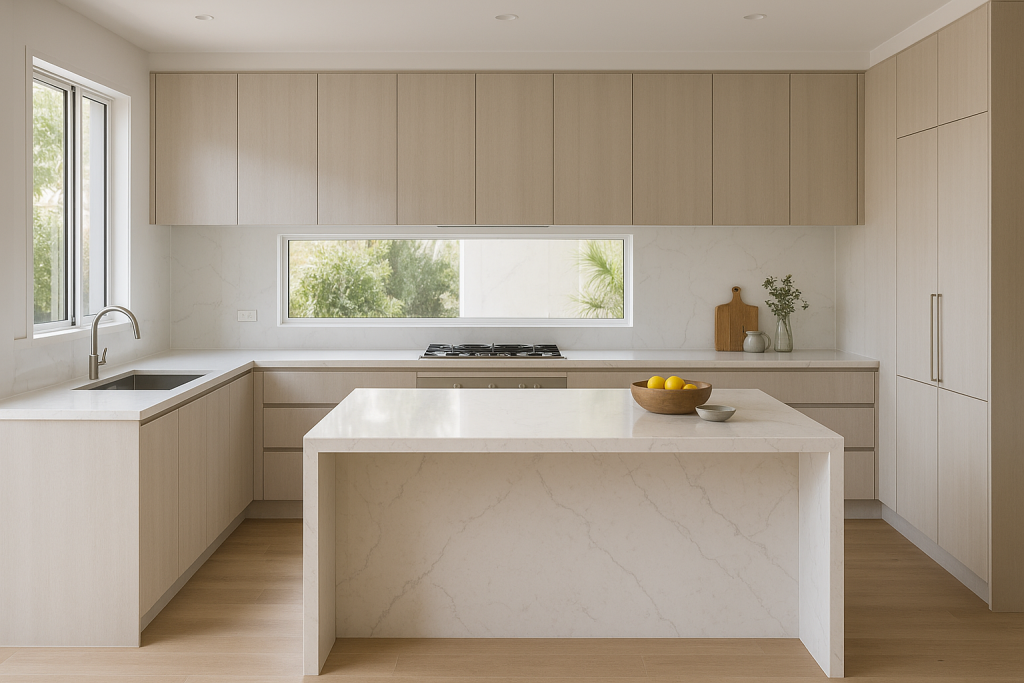
What Essastone is (and where it’s used)
Essastone is engineered quartz supplied in slabs, then cut, edged and installed as finished surfaces.
Common uses:
- Kitchen benchtops and islands
- Laundry benchtops
- Vanity tops
- Waterfall ends
- Stone splashbacks (standard height or full-height)
You might see searches for “essa stone” or “essa stone benchtop”. It’s the same product category. What matters most is the layout, fabrication details, and install conditions, especially how straight and level the cabinetry is.
Choosing Essastone colours (without second-guessing)
Showroom lighting and home lighting can look very different. In SEQ, natural light can be bright and change quickly across the day, especially in open-plan homes.
Use this simple process to narrow it down.
1) Choose warm or cool undertones
Start here:
- Warm: creamy whites, beige, warm greys
- Cool: crisp whites, cool greys
Warm undertones often suit warmer timber floors or sandy-toned tiles (common in coastal SEQ). Cool undertones often suit cooler greys, chrome, and crisp white palettes.
2) Match the busiest visual element
Match the stone to whatever has the most “visual noise”, such as:
- Flooring
- Splashback tile
- Timber tone (floors or cabinetry)
You don’t need an exact match. You’re mainly avoiding a clash of undertones or patterns.
3) Pick your movement level (veining)
- Low movement: clean, modern, often hides joins better
- Medium movement: adds interest without dominating
- High movement / bold veining: premium look, but join placement and vein direction matter more
Bold veining can look amazing on an island, but it can make waterfall alignment and joins more noticeable. If you want bold veining, allow time to review layout and sign-off drawings properly.
Polished vs matte/honed-style finishes
- Polished: brighter and more reflective (you’ll see lights and window reflections)
- Matte/honed-style: softer look and can reduce obvious fingerprints, but some colours show smudges or dark marks more than expected
If you can, view samples in light similar to your kitchen (morning and afternoon can read differently in SEQ).
Popular looks (beyond “Carrara style”)
- Carrara-style / marble-look: white base with soft grey veining
- Concrete-look: modern, forgiving, works well with timber and black hardware
- Solid white: crisp and minimal; lighting and shadows matter
- Grey veined: a safe middle ground for many cabinetry colours
“Carrara Essastone”: two practical tips
If you want a Carrara-style look:
- Plan vein direction for islands and waterfalls so the pattern doesn’t look like it flips.
- Allow for batch variation between slabs, especially on large kitchens and waterfall ends.
Want a quick shortlist? Send your cabinet colour, floor colour, and a natural-light photo and we’ll suggest options that suit typical SEQ palettes.
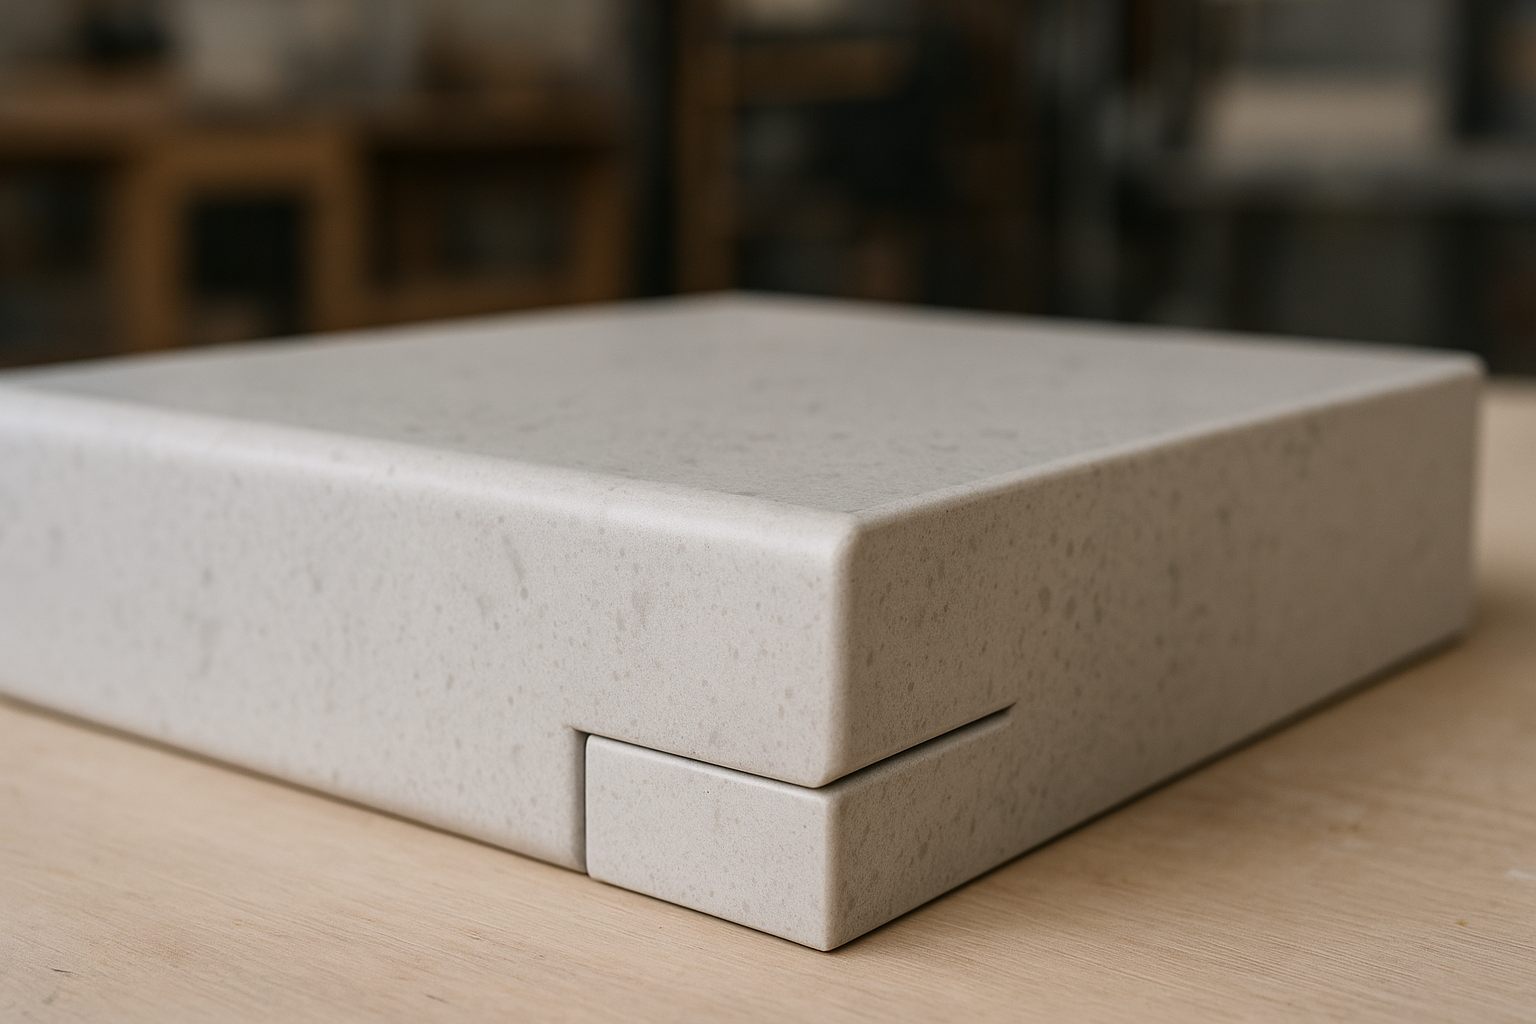
20mm vs 40mm: what actually changes
Thickness changes the look fast, and it can affect how complex the fabrication is.
20mm Essastone benchtops
20mm suits:
- Modern, flat-panel cabinetry
- Smaller kitchens (a thick edge can feel heavy)
- Tighter budgets
You still need correct support, especially for:
- Overhangs
- Dishwasher gaps
- Wide cabinet spans
The “40mm look”: two common build methods
Most 40mm benches are a 20mm slab with extra edge work.
1) Laminated build-up (drop edge)
- Extra 20mm strip is laminated to the front edge
- Looks thicker from standing height
- Best for straight runs and simpler islands
2) Mitred edge (thick look on exposed ends)
- Stone is cut at 45° and joined to look like solid thickness
- Best when the edge is seen from multiple angles
- Common for feature islands and waterfall ends
Where the 40mm look works best
- Feature islands that need more presence
- Waterfall ends
- Breakfast bars where the edge is part of the design
Pros and cons of the 40mm look
Pros
- Stronger “feature” edge
- Suits Shaker/classic cabinetry and bigger rooms
- Helps an island feel more substantial
Cons
- Higher cost (more labour and edge work)
- More complex joins (especially mitres and waterfalls)
- Heavier pieces can complicate access (stairs, narrow entries)
What drives the price difference (20mm vs 40mm look)
- Laminated build-up vs mitred build
- Number and length of exposed edges
- Waterfall ends (extra panels and joins)
- Veining complexity (more planning and matching)
Fabrication details that affect the finish
These choices affect how your kitchen looks and how it feels day to day.
Edge profiles (what to choose)
- Eased / square eased (arris): clean and popular, removes sharpness
- Pencil round: family-friendly, softer for knocks
- Bevel: suits classic styling, adds definition
- Mitred: used for thick-look edges and waterfalls, more labour-intensive
If you’ve got kids or a busy kitchen, eased or pencil-round is usually the practical choice.
Joins and seam placement (rules of thumb)
Joins are normal. They’re often required due to slab size, transport limits, access, and cut-out safety.
We generally aim to:
- Avoid joins through cut-outs where possible (especially cooktops)
- Keep joins out of high-visibility sightlines when we can
- Match joins to the pattern so they’re less noticeable
- Plan seams early on long runs (better planned than forced)
If you want the cleanest look, tell us where you’ll view the island most (kitchen side or living side). That can change the best seam location.
Cut-outs: sinks, cooktops and tap holes
Cut-outs are where accuracy matters most. They’re also where last-minute changes create delays.
Key points:
- Cooktops: must follow the manufacturer’s template and clearances
- Undermount sinks: need extra internal polishing and correct corner radii
- Topmount sinks: simpler cut-out, but the rim is visible so finish matters
- Tap holes / filtered taps: confirm early, especially with stone splashbacks
Changes after templating can mean rework. In real timelines, delays often come from late-arriving appliances or a late switch (for example, topmount to undermount).
Drainer grooves
Drainer grooves can look great, but they need planning.
- Not every layout suits them (space and fall direction matter)
- They need correct slope to drain properly
- They can take longer to clean than a flat surface
- They add fabrication time and cost
If you do lots of handwashing, a simple drainer mat can be easier to live with than grooves. It comes down to preference.
Splashback options (stone, height and cut-outs)
A stone splashback can be:
- Standard height: often around 200–300mm (varies by design)
- Full-height: benchtop to overhead cupboards, or benchtop to ceiling
Key checks:
- Confirm power point locations before templating
- Allow for window reveals and tight corners
- Use correct sealing and movement gaps (don’t hard-fix into corners)
- Behind cooktops, follow the appliance maker’s clearance and heat guidance
If you’re planning a servery window or wide openings, full-height splashbacks and window details need extra attention at measure stage.
Waterfall end panels: what makes them look right
Waterfalls look best when alignment and pattern direction are deliberate.
What matters most:
- Mitre alignment between the top and the drop
- Vein matching so the pattern looks intentional
- Panel joins (sometimes needed due to height, access or slab yield)
- Support and fixing so the stone isn’t taking structural load
Send island dimensions early if you want waterfall ends. It helps lock in slab usage and join planning.
What to decide before we template
Before measure and template, confirm:
- Sink model and mounting type (undermount, topmount, flush-mount)
- Tap hole locations (including filtered water)
- Cooktop model and clearances
- Dishwasher position
- Pop-up power or bin systems (if any)
If you don’t have final models yet, we can still advise what must be confirmed before cutting.
Cabinet readiness checklist (to avoid delays)
Most issues aren’t the stone. They’re the cabinetry and services underneath.
Before digital measure/template, cabinetry should be:
- Installed, fixed and level
- As plumb and square as possible (especially near end panels)
- Braced for overhangs and long spans
- Confirmed for appliance specs (sink/cooktop cut-out requirements)
- Planned for cooktop support rails (if required)
- Finalised for power points (especially for splashbacks)
- Rough-in plumbing positioned to avoid drawer/bin clashes
- Clear for access (stairs, tight hallways, parking, lift access)
If key appliances aren’t locked in, it’s often better to wait than template too early and risk rework.
From quote to install (step-by-step)
- Site check (if needed): access, stairs, parking, disposal
- Digital measure/template: after cabinets are installed and secured
- Shop drawing sign-off: layout, joins, cut-outs, edges, splashbacks, waterfalls
- CNC cutting: accurate machining
- Edge profiling: eased, pencil round, bevel or mitred
- Polishing/finishing: to match the slab finish
- Dry fit/quality checks: joins, alignment and key dimensions
- Install & silicone: join, seal and finish neatly (neutral-cure where required)
- Final checks: levels, join lines, cut-out fit and sealing
Templating can’t happen properly until cabinets are fixed. Appliance changes can delay cutting, so lock in sink and cooktop early.
Essastone benchtop pricing: what drives the total
Benchtops are priced by the job, not from a simple price list. Two kitchens using the same colour can cost very different amounts.
Main pricing factors:
- Colour category and finish
- Total square metres
- Number and location of joins
- 20mm vs 40mm look (and mitres)
- Cut-outs (sink, cooktop, tap holes, drainer grooves)
- Edge profile choice
- Splashbacks (standard or full-height)
- Waterfall end panels
- Install access (stairs, tight corners, crane needs)
- Removal/disposal of old tops
- Rush jobs / short lead times
For an accurate quote, send a plan (or photos + rough measurements), your suburb, and your timing.
Essastone vs other engineered stone brands
Many customers also compare:
- Caesarstone
- Smartstone
- Stone Ambassador
What to compare across brands:
- The exact colour match you want (not just the name)
- Polished vs matte/honed-style finishes
- Availability for your schedule
- Lead times (slab supply plus fabrication capacity)
- Pattern behaviour across joins and waterfall ends
We can show comparable colours across ranges and explain any lead time differences.
Care and warranty
Essastone is easy to live with, but it’s not indestructible.
Care basics
Do:
- Wipe daily with mild detergent and a soft cloth
- Clean spills soon after they happen
- Use chopping boards
- Use trivets for hot cookware
Avoid:
- Abrasive scouring pads
- Harsh chemicals and solvent cleaners
- Cutting directly on the surface
- Hot pans straight onto the benchtop (thermal shock risk)
Manufacturer info: https://essastone.com.au/
Warranty: product vs workmanship
- Manufacturer warranty: covers the slab under Essastone’s terms
- Workmanship warranty: covers fabrication and installation (joins, fixing, fit and finish)
If there’s a concern, photos plus a short description helps assess it quickly.
Common planning mistakes (and how to avoid them)
- Choosing sink/cooktop too late (cut-outs depend on exact models)
- Missing window reveals and clearances (common with full-height splashbacks)
- Not planning joins on long runs
- Rushing island seating (overhang and support need checking)
If you want, we can review your plan and flag issues before you commit.
Stone benchtops Gold Coast (service area)
SEQ Stone is based in Burleigh Heads. We service the Gold Coast, Brisbane and South East Queensland.
If you’re working with a cabinet maker or builder, we coordinate timing around cabinet completion, plumbing/electrical rough-in, and appliance delivery so the stone stage doesn’t hold up the renovation.
If you’re unsure about your location, send your suburb and we’ll confirm availability.
Planning from outside SEQ?
We sometimes see searches like “stone benchtops Gold Coast” or “Essastone benchtops Perth”.
We service Gold Coast, Brisbane and South East Queensland only. If you’re nearby, send your suburb and we’ll confirm.
Next step: request an Essastone benchtop quote
Send us:
- Your kitchen plan (PDF) or photos + rough measurements
- Your preferred Essastone colour (or 2–3 options)
- Sink and cooktop models (if chosen)
- Your suburb and preferred install window
Then we’ll reply with clear pricing, lead time, and any design notes that affect the finish.
- Essastone page: https://seqstone.com.au/essastone/
- Gallery: https://seqstone.com.au/gallery/
If you add project photos to this page, use descriptive AU-local alt text (for example, “Essastone Carrara-look waterfall island Gold Coast”) and compress images to support Core Web Vitals.
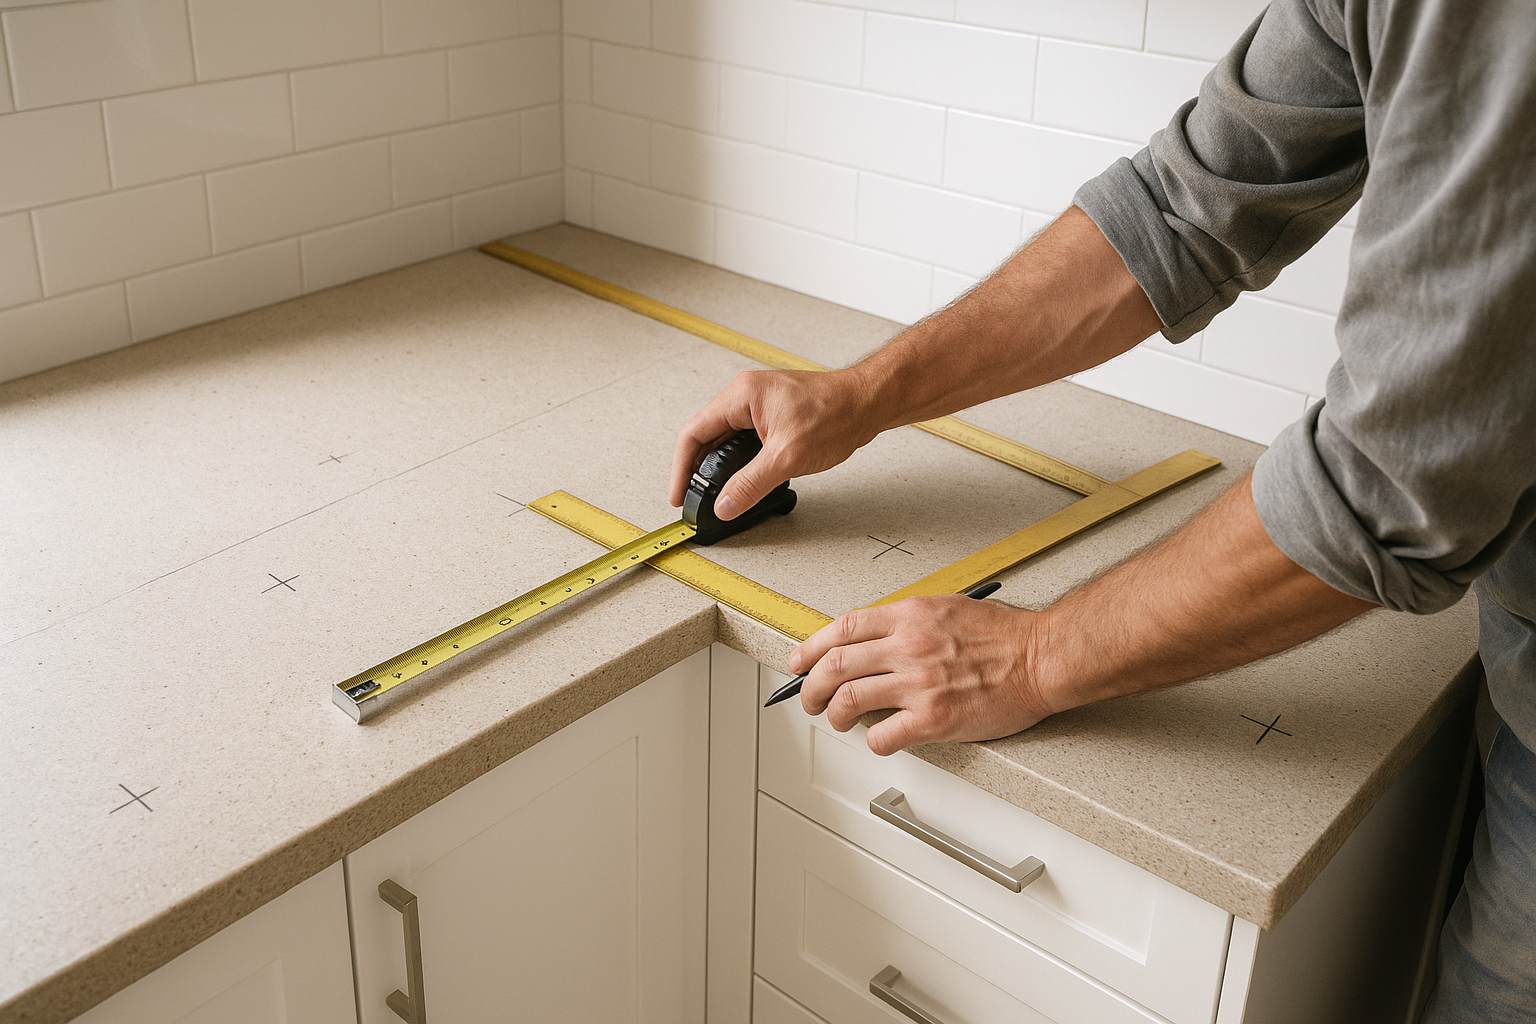
Accurate templating is where straight joins and tidy cut-outs start.
Quick FAQs
Is Essastone heat resistant?
Essastone handles everyday kitchen use well, but it’s not a direct-heat surface. Use trivets and avoid placing hot pans straight from the cooktop onto the benchtop.
Do I need 20mm or 40mm?
20mm suits clean modern kitchens and tighter budgets. A 40mm look is usually a laminated build-up or mitred edge and is popular on islands and waterfall ends. The best choice depends on proportions, exposed edges and how you want the kitchen to feel.
Where will the joins be?
Joins are planned around slab size, access, long runs and cut-outs. We avoid seams through high-stress cut-out areas where possible and aim to keep seams out of the most visible sightlines.
Can you do a stone splashback behind a cooktop?
Often, yes. Final suitability depends on the cooktop type, the manufacturer’s clearance/heat requirements, and details like power points and sealing.
How long after cabinets are installed can you measure/template?
As soon as cabinets are fully installed, fixed and level, and key appliance specs (especially sink and cooktop) are confirmed.
Can you quote from photos or do you need a plan?
We can provide an initial estimate from photos and rough measurements. Final pricing and fabrication require an on-site measure/template once cabinetry is installed.
Related reading: SE-O-HEALTH-1GqAd7

Leave a Reply
Want to join the discussion?Feel free to contribute!