YDL stone Brisbane: what to know before you choose a colour or book a benchtop
YDL Stone Brisbane: what to know before you choose a colour or book a benchtop
If you’re searching YDL stone Brisbane, you’re probably close to choosing a colour and booking a benchtop. This guide covers what actually affects the final look, price and install in Brisbane homes.
We cut and install stone benchtops across South East Queensland. Use this page to choose colours, thickness (including 40mm mitred), edges, waterfall ends, cut-outs, joins, and to understand the quote-to-install process.
Want to move fast? Jump to the Quick checklist.
What people mean by “YDL stone” (and how it compares)
Most people use “YD stone” or “YDL stone” to mean an engineered stone range for:
- Kitchen benchtops and islands
- Bathroom vanities
- Laundry tops
- Splashbacks (where suitable)
In Brisbane, YDL is often compared with Smartstone, Essastone®, Caesarstone®, WK Stone, Lithostone and similar ranges. The best comparison is usually: the exact colour you want, current availability, lead time, and what’s included in the installed package.
What usually makes the difference
- Colour/finish availability (in stock now vs ordered)
- Pattern consistency between slabs (important for veined looks)
- Fabrication complexity (cut-outs, mitres, waterfall panels)
Confirm these before you lock anything in
- Exact colour name and finish (polished, honed, matte)
- Thickness: 20mm or 40mm mitred
- Sink, cooktop and tap model numbers (cut-outs depend on these)
- Edge profile (front edge shape)
- Waterfall ends (and whether you want vein matching)
Colour names can be similar across brands. Samples help, but a slab viewing (or current slab photos) is safest for veined colours.
Is YDL stone available in Brisbane?
Often yes, but it depends on the colour and current slab stock. In SEQ, YDL is usually supplied through your fabricator/installer as part of the benchtop package.
If you’re working with SEQ Stone, we can coordinate:
- Confirming the exact colour/finish
- Checking availability against your timeline
- Booking measure-up, fabrication and installation to suit your cabinet maker or builder
If you’re juggling multiple trades, send your suburb and key dates early (cabinet install, tiling start, appliance delivery). It makes scheduling smoother.
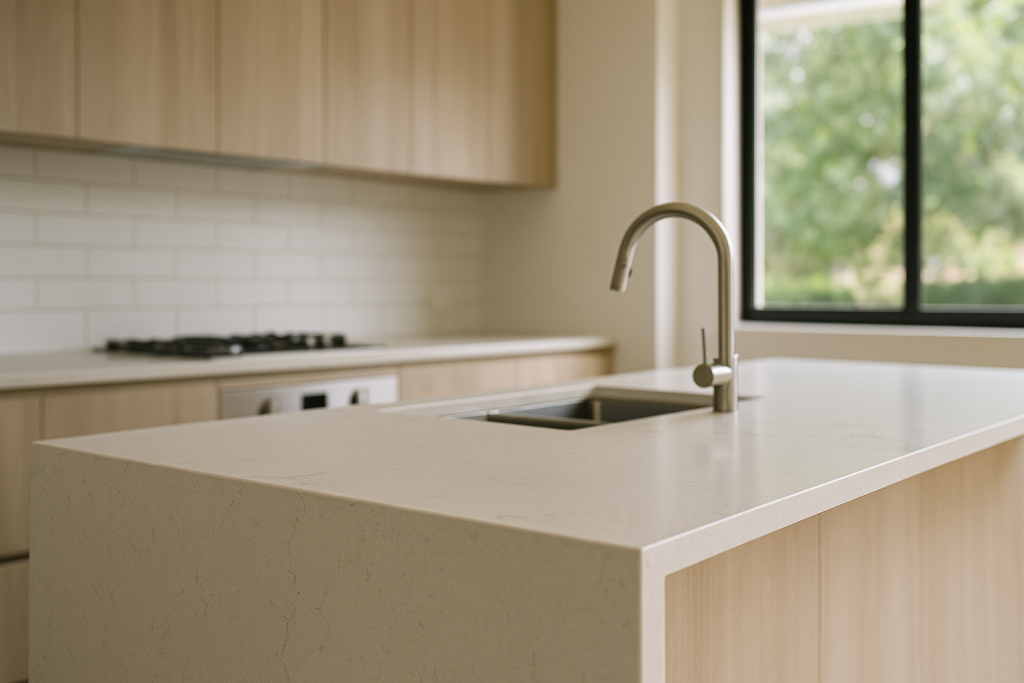
YDL stone colours: how to choose for Brisbane light
Brisbane homes often get strong daylight. That can make whites look cooler than they did in a showroom, and can make warm greys read more beige (especially with timber and warm LEDs).
A simple process to reduce “colour regret”
- Start with your cabinetry colour (white, warm white, timber, charcoal)
- Choose an undertone: warm (cream/beige), cool (grey), or neutral
- Check pattern scale: fine speckle vs bold veining
- View it next to your splashback and flooring
- For veined colours, confirm vein direction (important for waterfalls and seams)
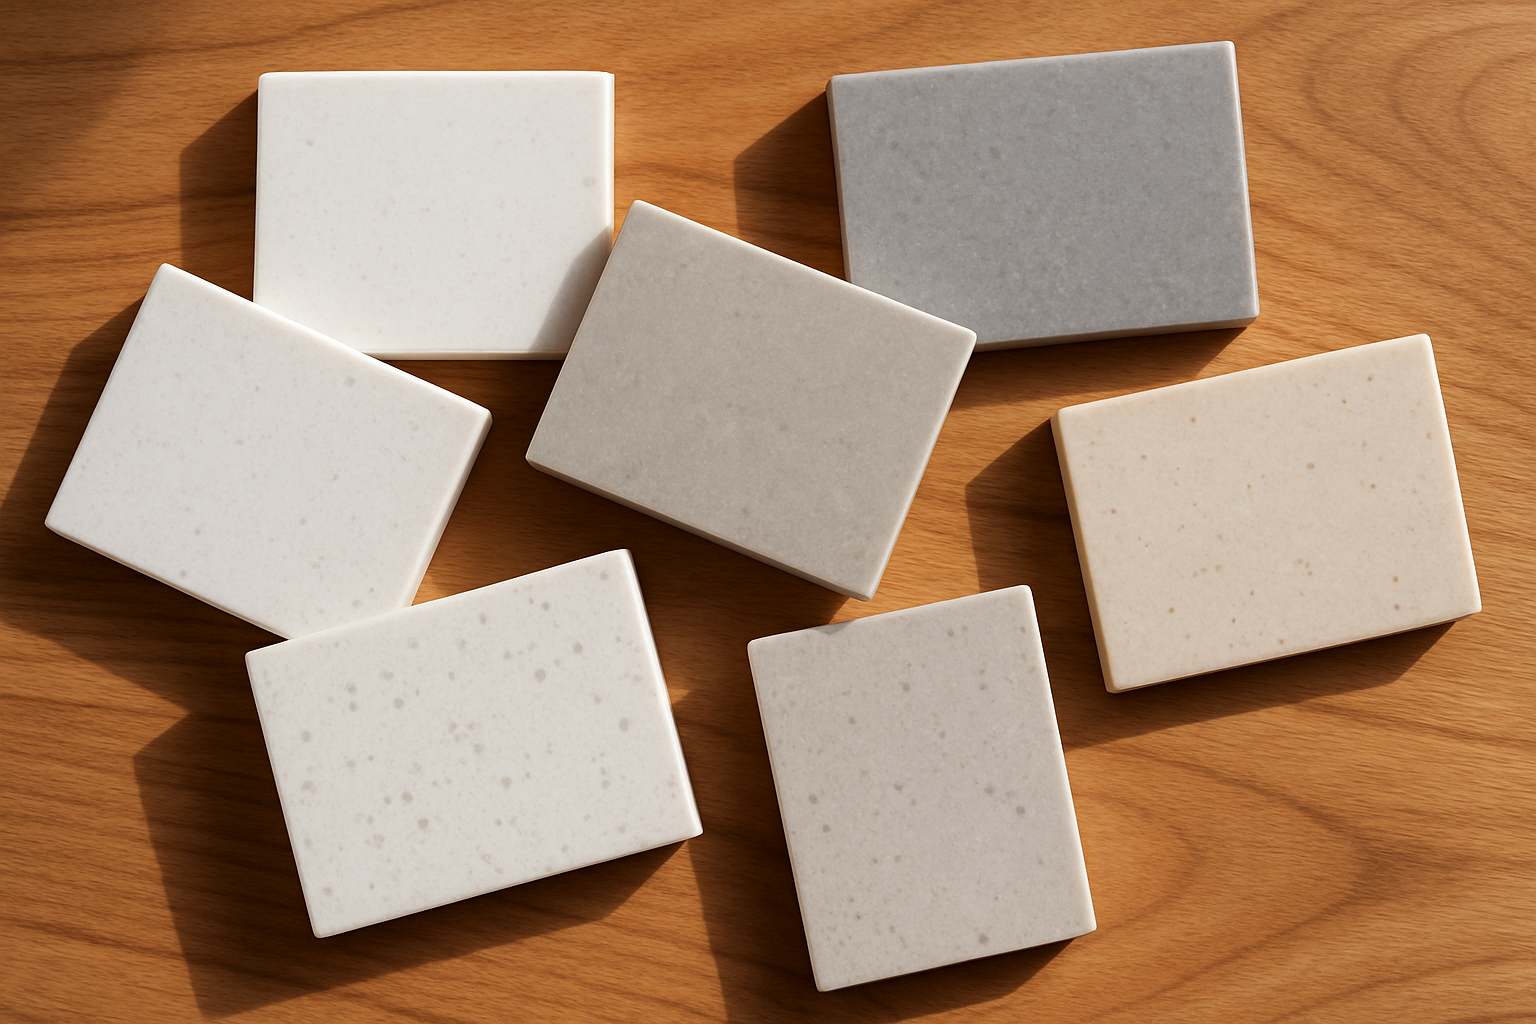
How to view samples properly
- Take the sample to site and check it morning/day/night under your real lights
- Hold it against cabinet, floor and wall colour samples
- For veined looks, ask to view slabs (or current slab photos) before ordering
YDL stone Jasmine (quick note)
YDL Stone Jasmine generally reads as a light, soft tone. Like most pale engineered stones, it can shift depending on:
- North-facing daylight vs shaded rooms
- Warm vs cool LEDs
- Nearby timber and warm floors
It often pairs well with warm whites, light timbers, and brushed nickel/chrome. If your walls or cabinetry are very creamy, check a sample on site first.
If you want, we can show similar shades across Smartstone, Essastone® and Caesarstone®.
Where YDL stone is used most (kitchens, vanities, laundries)
Most YDL engineered stone enquiries in Brisbane are for:
- Kitchen benchtops and islands (often with waterfall ends)
- Bathroom vanity tops (often with undermount basins)
- Laundry tops (tub cut-outs and practical edges)
Kitchens usually need the most planning for joins, cooktop clearances and seating overhang support. Vanities often come down to tap and basin placement. Laundries are cut-out heavy, so simple edges are often best.
Edges & thickness (20mm vs 40mm mitred)
Thickness and edge detail change the visual weight of the kitchen and the fabrication time.
20mm benchtops
20mm suits most homes because it:
- Looks clean and modern
- Works with most cabinet designs
- Usually keeps fabrication simpler and more cost-effective
It’s also common for apartments and tight-access sites.
40mm mitred edge (the “40mm look”)
A 40mm mitred detail is an edge build-up so the benchtop appears 40mm thick. It’s not just “a thicker slab”.
Pros
- Strong feature look (especially on islands)
- Pairs well with waterfall ends
- Adds visual weight to large, open-plan kitchens
Cons / cost drivers
- More labour and fabrication time (mitre build-up, bonding, finishing)
- More planning for where the thicker edge starts/stops
- More corners and detail to finish
On smaller runs, 20mm can look sharper and less “heavy”.
Edge profiles (arrised, pencil round, mitred)
Your edge profile is the front edge shape. It affects comfort and how easily corners chip.
- Arrised: modern square look with the sharpness eased
- Pencil round: small radius; softer feel and a smart pick for family homes
- Mitred: used to create the 40mm mitred look
If you want a thin vs thick look, say 20mm or 40mm mitred upfront so the quote and drawings match.
Finishes: polished vs honed/matte
Finish changes both the look and the day-to-day feel.
- Polished: brighter, reflective, generally easy to wipe clean
- Honed/matte: softer look; can show fingerprints or marks more in some colours
If your island gets heavy daily use, handle a sample in the exact finish you’re choosing.
Island benchtops and waterfall ends: decide these early
Islands are often the most visible part of the kitchen. If you decide late, you can end up redesigning joins, overhang supports or slab layout.
Island decisions to confirm
- Seating overhang depth and where support will go
- Square ends vs panels vs waterfall ends
- Power points, pop-up sockets or appliance garages (these can affect joins and cut-outs)
Waterfall ends and vein direction
Waterfalls look best when the pattern is planned.
If your colour is veined and you want the veining to “wrap” down the panel, it can affect:
- Slab yield (how many pieces come from each slab)
- Seam locations
- Price and lead time
Also flag access early. Large waterfall panels can be difficult in tight Brisbane sites (stairs, lifts, narrow hallways). Some jobs need extra crew or mechanical handling (Hiab/crane).
Cut-outs & accessories (what we need before we cut)
Cut-outs are where accuracy matters most. We cut to actual appliance specifications, not guesswork.
The most common delay is not having the sink or tap selected. If you want a firm install window, lock in model numbers before templating.
Sink cut-outs: topmount vs undermount
- Undermount sinks: clean look and easy wipe-down into the sink. They need correct support and a neat internal cut-out finish. We’ll confirm the “reveal” style (how much rim is visible, if any).
- Topmount sinks: sit on the benchtop. Often simpler for certain retrofits and some budgets.
Either way, we cut to your exact sink model. Corner radius, drainer position and accessory rails can change the cut-out.
Cooktop cut-outs
Cooktop cut-outs are set to the manufacturer’s spec. If you’re supplying the cooktop, we’ll need the exact model number and the installation diagram.
Tap holes and extra holes (filter, waste, soap)
We can allow for:
- Mixer tap holes
- Filter tap holes
- Waste/garbage disposal air switch holes (where specified)
- Soap dispenser holes
Placement depends on your sink, your tap set and how you use the space.
What to send (so nothing is assumed)
- Sink model number + spec sheet / cut-out template
- Cooktop model number + installation diagram
- Tap set model number(s) + any extra holes required
If you’re not sure, send the product link plus the PDF spec sheet.
Drainer grooves (optional)
If you want drainer grooves, mention it early. They need planning around:
- Water direction and fall
- Space beside the sink
- How you prefer to clean the area
Seams/joins: placement, visibility and vein matching
Most kitchens need at least one join due to slab size, layout, access, or long runs and waterfall ends.
Where joins typically go
Joins are commonly placed:
- Near the sink run (but ideally not through the main prep zone)
- At changes in direction (L-shapes)
- Where a run exceeds slab size or handling limits
- At waterfall transitions (depending on vein matching and slab yield)
We aim to align joins with cabinet breaks and avoid skinny “slivers” of stone.
What affects join visibility
Even a well-finished join can be more noticeable depending on:
- Colour (light solids can show fine lines)
- Pattern/veining (bold veining makes matching more obvious)
- Lighting (daylight and downlights can highlight join lines)
Vein matching: realistic expectations
For veined engineered stone, we can plan the layout to improve flow. Keep in mind:
- Veins won’t fully “disappear” at joins
- Slabs vary, so best results come from slab photos or a slab viewing
- Waterfalls and book-matching requests can increase material use and labour
Structural considerations
Join planning also considers support and strength, including:
- Long spans and seating overhangs
- Weak points around sink and cooktop cut-outs
- Areas over dishwashers and other appliances
If you have a long run or large cut-outs close together, we’ll flag any reinforcement/support needs during design review.
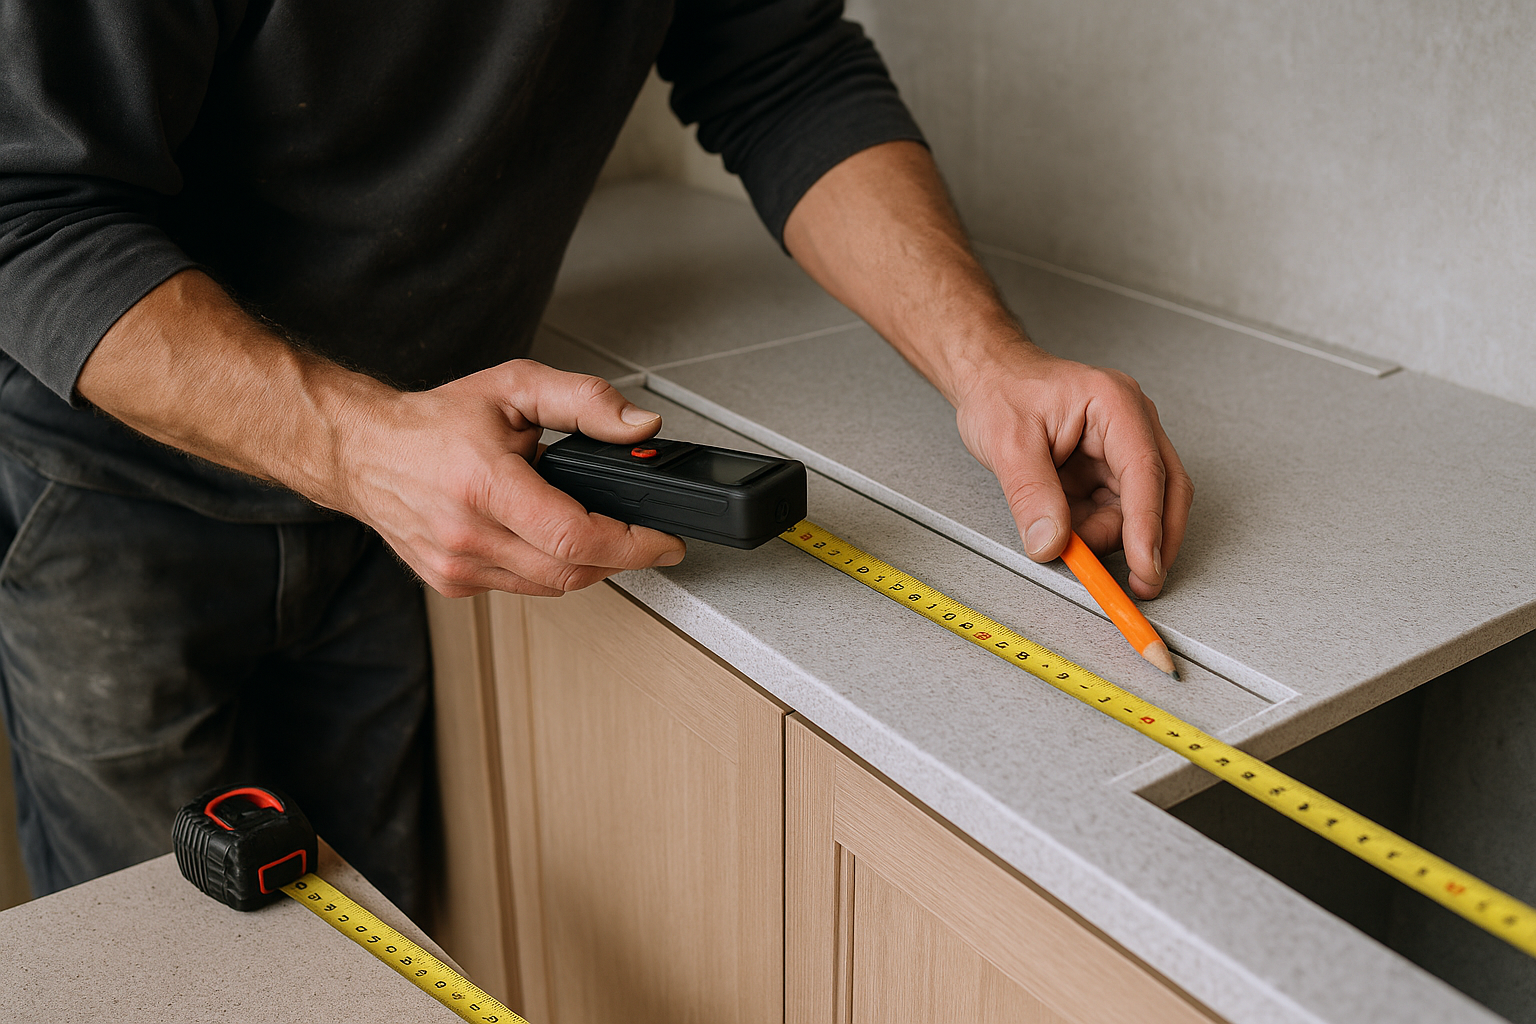
Template/measure-up (what templating captures)
Templating captures details that plans alone usually miss, including:
- Exact wall lines (including out-of-square corners)
- Appliance and sink positions relative to cabinet internals
- Overhang depths and support locations
- Scribing requirements
- Confirmed seam locations (so you know what you’re getting before cutting)
Measure-ups go smoothly when cabinets are genuinely ready.
Installation readiness checklist (Brisbane sites)
These items prevent delays and call-backs.
Cabinets level and fixed
- Cabinets installed, level, and fully fixed to wall/floor
- No rocking cabinets (packers/shims in place and secured)
- Overhang support confirmed (brackets/frames as required)
End panels, fillers and scribes
- End panels and finished fillers installed
- Any scribes to walls completed (so templating is accurate)
Appliances and model confirmations
- Sink, cooktop and tap model numbers confirmed before templating
- Appliances on site, or selected with spec sheets ready
Site access and parking (common in Brisbane)
- Clear path from truck to the install area
- Apartment lift bookings/loading dock rules organised (if applicable)
- Parking/loading confirmed (timed zones can affect scheduling)
- Tell us early about stairs, narrow hallways, steep driveways or site inductions
Protect floors and work area
- Floors protected where needed (especially timber/vinyl)
- Safe work zone cleared around install areas
Plumbing disconnection/reconnection
- Confirm who is disconnecting and reconnecting plumbing (usually your licensed plumber)
- For undermount sinks: confirm support method and timing for final connections
CNC fabrication (and what’s still hand-finished)
After templating, fabrication usually includes CNC machining for:
- Sink and cooktop cut-outs
- Tap/accessory holes
- Drainer grooves (if included)
- Edge profiling
Some details are still hand-finished, including:
- Final edge refinement and touch-ups
- Mitre assembly finishing (40mm mitred build-ups)
- On-site seam finishing where joins are completed in place
Stone splashbacks in Brisbane: what to consider
Stone splashbacks can look clean and minimal, but they’re not suitable everywhere.
When tiles (or another material) can be a better choice
Tiles can be preferable when:
- You want more heat tolerance behind a cooking zone
- You want a more cost-effective option for a large wall area
- The wall is significantly out of plumb and you need easier adjustment
Heat clearances behind cooktops
Behind cooktops, heat zones and manufacturer clearance requirements matter. In some layouts, another compliant material (often glass or tiles) is the safer choice.
If you want a stone splashback, share your cooktop type and layout early so we can confirm suitability.
Brisbane and SEQ quote-to-install process
Most YDL benchtops in Brisbane follow this workflow:
- Enquiry: send plans, rough dimensions, photos, suburb, and access notes
- Design review: confirm thickness, edges, waterfalls, overhang support, likely seam locations
- Quote: based on layout, cut-outs, edges, access, and any handling requirements
- Template/measure-up: once cabinets are installed and ready
- Fabrication: CNC cutting, edge work, mitres/waterfalls, finishing
- Installation: delivery, fit, joins, final checks
- Aftercare: cleaning and care advice (plus sealing guidance if applicable)
Lead times usually hinge on cabinet readiness and having appliance model numbers locked in.
What affects price and lead time in Brisbane
These are the biggest drivers of cost and timing:
- Slab availability (especially popular whites and veined colours)
- Colour/pattern complexity and vein matching
- Thickness: 20mm vs 40mm mitred
- Edge profile (arrised, pencil round, mitred)
- Waterfall ends and returns
- Cut-outs (sink, cooktop, tap holes, drainer grooves)
- Undermount sink mounting and reinforcement around cut-outs
- Access (stairs, tight hallways, apartment lifts)
- Parking/loading restrictions and site safety requirements
- Large pieces needing extra crew or mechanical handling
For inner-city Brisbane and apartments, access can matter as much as the benchtop itself.
What to expect on install day
A smooth install depends on site readiness.
Before we arrive
- Clear benches and provide a safe work area
- Ensure cabinet runs are level and fully fixed
- Confirm plumbing/electrical rough-ins are complete and correctly placed
- Provide clear access from unloading point to the kitchen
- Arrange parking/loading permissions if needed
Typical install steps
- Arrival and floor/path protection (if required)
- Dry fit and checks
- Install pieces and align edges/overhangs
- Complete joins/seams on site (where required)
- Silicone and finishing touches
- Final checks (edges, joins, chips, cut-outs, support)
Silicone cure times and other trades
Silicone needs time to cure. We’ll advise the safe timing for your job.
If you have an undermount sink, confirm with your plumber when they’ll connect it and whether brackets/clips are required for your sink type.
Quality checks that matter
We focus on:
- Seam placement that makes sense for daily use
- Correct overhang support (especially island seating)
- Clean cut-out finishing and practical edges to reduce chipping risk
- Secure undermount sink support
- Reinforcement around cut-outs where required
Engineered stone regulations in Australia (what’s changed)
Australia has tightened rules around engineered stone due to silica exposure risks during cutting and processing.
From 1 July 2024, Australia introduced a national prohibition on the supply, manufacture, import and use of engineered stone benchtops, panels and slabs that contain 1% or more crystalline silica (by weight), with limited exceptions under the national framework.
What this means for Brisbane customers
- Some products previously sold as “engineered stone” may no longer be available.
- Some newer “engineered stone style” surfaces are designed to comply (for example, lower-silica or silica-free mineral surfaces).
Questions to ask your fabricator/installer
- Is this specific product compliant to supply and fabricate in Australia today?
- What is the crystalline silica content, and what documentation supports it?
- What dust control and safe-work methods are used for any on-site adjustments?
If you’d like, send us the exact colour/product you’re considering and we’ll confirm what can be supplied and fabricated for your timeframe in Brisbane.
Stone sealing & care (engineered stone)
Engineered stone is low maintenance, but it still needs basic care.
Does engineered stone need sealing?
Most engineered stone does not need routine sealing like many natural stones. Recommendations can vary by product and finish, so follow the manufacturer’s guidance.
Cleaning routine
- Wipe with a soft cloth or sponge using mild detergent and water
- Drying helps reduce streaks, especially on darker or matte finishes
What to avoid
- Harsh chemicals (strong acids/alkalis) and abrasive powders
- Scouring pads that can dull finishes
- Leaving strong cleaners sitting on the surface
- Putting hot pots/trays directly on the surface (use trivets)
Common warranty exclusions (varies by brand)
- Heat damage
- Chips/cracks from impact or poor support
- Damage from harsh chemicals or unsuitable cleaners
- Unauthorised modifications or cutting by others
“YDL stone Dandenong South” and supply questions
People often search “YDL stone Dandenong South” to understand distribution.
For a Brisbane benchtop, the practical questions are:
- Is your colour in stock for your timeline?
- Can you view a sample or current slab photo?
- Can measure-up and install be booked to suit your cabinet schedule?
Comparing YDL with other brands
If you’re also considering WK Stone, Lithostone, Essastone®, Smartstone or Caesarstone®, compare based on:
- Colour match in your lighting (check a sample on site)
- Finish (polished vs honed/matte)
- Pattern consistency
- Slab availability and lead time
- Installed price once cut-outs, edges and waterfall panels are included
We can quote like-for-like so you can compare on real numbers.
Brisbane/SEQ conditions: apartments, access and tight schedules
Common SEQ constraints include:
- Tight stairwells, narrow corridors and small lifts
- Lift bookings and loading dock rules
- Limited parking or timed loading zones
- Site inductions on larger builds
- Large pieces needing extra handling
If access is tricky, tell us early. It helps us plan the right crew and a realistic install window.
Quick checklist: what to send for a fast, accurate quote
Send:
- Plan with dimensions (PDF or clear photo)
- 2–4 photos of the space
- Suburb and access notes (stairs, lift, driveway, parking/loading)
- Preferred colour (or 2–3 options) and finish
- Thickness: 20mm or 40mm mitred
- Edge profile: arrised, pencil round, or mitred
- Sink, tap and cooktop model numbers + spec sheets (or links)
- Notes on waterfall ends, island seating overhangs, splashbacks, drainer grooves
- Building constraints (lift booking, narrow access, site induction, crane/Hiab needs)
- Timing: cabinet install date, preferred measure-up window, hard deadlines
Ready to price your YDL stone benchtop in Brisbane?
We can help with supply coordination through to installation across South East Queensland, including Brisbane, Ipswich, Logan, Redlands and the Gold Coast.
For contact details and NAP, use our Contact page: https://seqstone.com.au/contact/
Tip: Include your plan and a photo of the colour you like. If you’re deciding between YDL and another range, tell us so we can price like-for-like.
FAQs
Is YDL stone good for kitchen benchtops?
Yes. It’s widely used for kitchens, vanities and laundries. Results depend on accurate templating, correct support, clean cut-outs and sensible join planning.
Is YDL stone available in Brisbane?
Often yes. Availability depends on the specific colour/finish and current slab stock. The simplest approach is to choose your colour, then have your fabricator confirm supply and timing.
What’s better: 20mm or 40mm mitred?
Neither is “better”. 20mm is clean and suits most kitchens. 40mm mitred gives a thicker feature look and suits islands and waterfall ends, but it adds labour and cost.
What edge profiles can I choose?
Common options are arrised (square but eased), pencil round (small radius), and mitred (for a 40mm look).
Do you do sink cut-outs, cooktop cut-outs and tap holes?
Yes. We cut to the actual sink, cooktop and tap model specs, including undermount sinks and extra holes for filter taps or soap dispensers.
What info do you need for cut-outs?
Sink/cooktop/tap model numbers plus the spec sheets (or cut-out templates/installation diagrams). Links are fine if they include the PDFs.
Can I have drainer grooves next to the sink?
Often yes. They need to be planned with sink position and available bench space, so mention it early.
Where will the joins/seams go?
We plan joins around slab sizes, your layout, access, and high-use areas, then confirm join locations before cutting starts. Colour, pattern and lighting affect how visible joins are.
Are stone splashbacks okay behind a cooktop?
Sometimes. Heat zones and manufacturer clearances matter. In some layouts, another material (often glass or tiles) is the safer choice.
Do Australian engineered stone regulations affect my benchtop choice?
They can. From 1 July 2024, Australia introduced a national prohibition on engineered stone products at or above 1% crystalline silica (by weight), with limited exceptions. Ask your fabricator to confirm compliance for the exact product and provide documentation.
How do I care for engineered stone day to day?
Use mild detergent and water, avoid abrasives/harsh chemicals, wipe spills early, and use trivets for hot items. Most engineered stone doesn’t need routine sealing, but follow product-specific guidance.
Do you install in Brisbane and nearby areas?
Yes. We service Brisbane and SEQ, including Ipswich, Logan, Redlands and the Gold Coast. Access (stairs, lifts, parking) can affect scheduling, so share details early.
Related reading: Contact SEQ Stone


Leave a Reply
Want to join the discussion?Feel free to contribute!