Lithostone surfaces in Australia: what matters before you choose a colour or request a quote
Lithostone Surfaces in Australia: What to Know Before You Choose a Colour or Request a Quote
Looking for Lithostone surfaces in Australia? This guide helps homeowners, renovators, and builders compare Lithostone benchtops with other engineered stone options. You’ll find clear answers on colours, pricing, lead times, joins, and installation.
Lithostone Pricing in Australia: What Affects the Quote
Lithostone pricing isn’t a fixed number. Your quote depends on your kitchen layout, the slab you choose, how much cutting and shaping is needed, and how difficult the installation is. In South East Queensland, most engineered stone benchtop projects (material, cutting, and installation) cost in the mid-thousands and higher, depending on your choices.
What Typically Pushes Pricing Up
- Slab category and colour: Some whites and patterns cost more.
- Slab size and waste: Large islands, waterfalls, or specific veining often use more material.
- Thickness and edge detail: For example, 20mm vs 40mm mitred build-ups.
- Cut-outs and drilling: Like holes for sinks, cooktops, taps, or filters.
- Seams/joins: More joins mean more planning and site time.
- Splashback size: Upstands vs full-height stone.
- Access and handling: Stairs, narrow entries, lift bookings, or long carries.
- Timeframes: This includes stock availability and scheduling.
What Quotes Usually Include (and Exclude)
- Commonly included: Supply of stone, cutting and shaping, delivery, and installation.
- Often excluded or priced separately: Plumbing, electrical work, removal/disposal of old benchtops, patching/painting, and tiling.
Quote Comparison Tip
When comparing quotes, make sure the specifications match. Check the edge detail, number of pieces, splashback size, and cut-outs. A cheaper quote might simply mean fewer pieces or a different seam plan.
Installation Steps: Measure to Handover
The installation process matters. It affects lead time, where seams are placed, and whether everything fits correctly the first time.
Typical Engineered Stone Workflow
- Measure / Template: We confirm cabinet sizes, wall conditions, overhangs, and appliance clearances. For renovations, we often template to exact site conditions.
- Slab Selection + Layout Planning: You confirm your chosen colour and its availability. We plan veining direction, island orientation, and waterfall alignment.
- Digital Cutting: CAD/CNC programming creates a digital layout for accurate cutting and less rework.
- Edge Profiling: We create the 20mm edge finish or 40mm mitred edge build-ups, as specified.
- Sink/Cooktop Cut-outs: Undermount sink cut-outs are finished to suit your sink model and mounting method. Cooktop cut-outs follow appliance specifications.
- Polishing / Finishing: Faces and edges are finished to match your polished or matte/honed selection.
- Workshop Check (if needed): We check joins, alignment, and fit before installation day.
- Installation: This involves safe handling, placement, and levelling the stone on your prepared cabinetry.
- Seam Finishing: Joins are bonded with colour-matched adhesive/resin and finished smooth.
- Seal & Clean: We seal junctions as required and clean down the surface for handover.
SEQ Note: Access Can Change the Whole Plan
Stairs, tight side passages, apartment lift bookings, car stackers, and parking rules can all affect scheduling. These factors may also increase the number of pieces needed, which means more joins.
Seams (Joins): Where They Appear and What to Expect
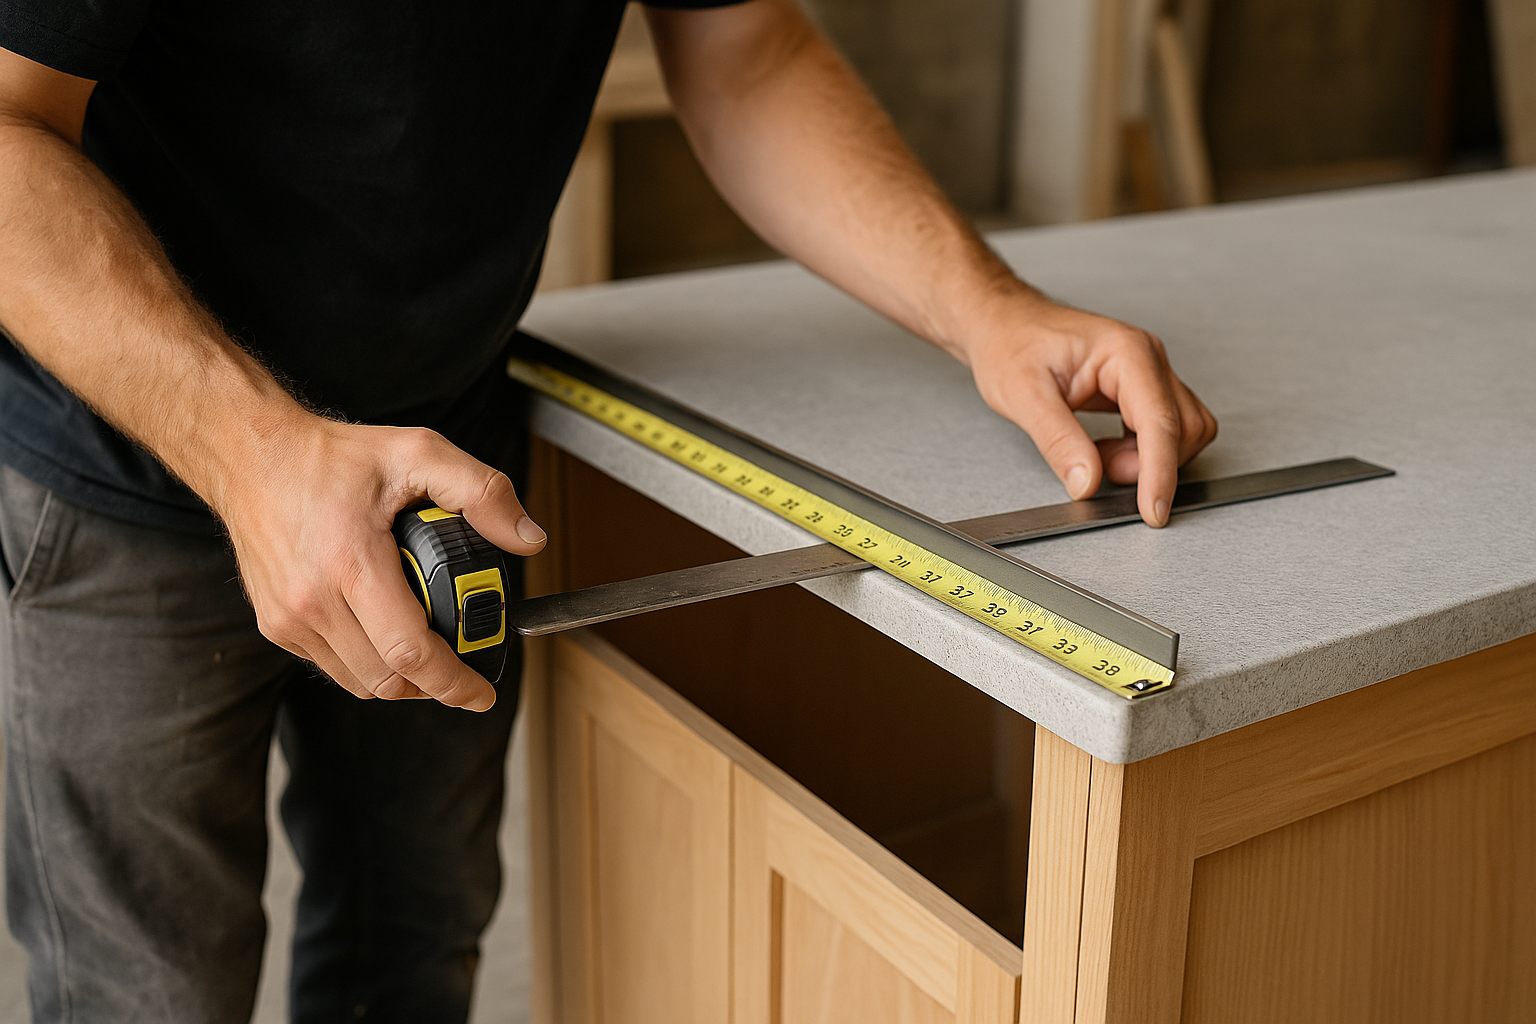
Accurate measure and templates are what make joins, cut-outs and overhangs land correctly.
Most real kitchens need at least one seam. Slab sizes, layout, and access usually make joins the safest and most practical option.
Where Seams Typically Appear
- L-shapes and U-shapes: Corners are commonly joined.
- Long runs: Beyond slab size or safe handling limits.
- Large islands: Due to length, access path, or to reduce risk.
- Near cut-outs: Sometimes used to manage strength and handling.
How Seams Are Finished
- Bonded with colour-matched adhesive/resin.
- Levelled, cleaned, and finished to reduce visibility from a normal standing distance.
Visibility: What’s Realistic
Joins can be more noticeable on bright whites, concrete looks, and strong veining. While vein matching can be planned, it may increase slab use and cost. Downlights or pendant lights can also highlight joins from certain angles.
If you want the “quietest” seams possible, tell us early. Seam placement is mostly decided during templating and layout.
Australian Standards, Compliance, and Silica (High-Level)
You don’t need to memorise standards. You should expect your supplier and fabricator to work in line with relevant Australian Standards, supplier documentation, and safe site practices.
One commonly referenced product standard is:
- AS/NZS 3715 (as applicable): Product requirements and test methods for engineered stone slabs.
Silica-Related Changes (General Info, Not Legal Advice)
Australia has introduced tighter controls around silica exposure and engineered stone processing. Requirements can change.
Practical checks to make:
- Ask for current supplier declarations/documentation for the slab you’re considering.
- Confirm your fabricator uses appropriate dust control and safe processing practices.
- Share any builder/WHS (Work Health & Safety) requirements early so paperwork and scheduling aren’t delayed.
What Lithostone Is (and Where It’s Used)
Lithostone is an engineered stone surface, often searched as engineered quartz surfaces in Australia. It comes in slabs that are cut and finished to fit your space.
Common uses:
- Kitchen benchtops and islands
- Bathroom vanities
- Laundry benchtops
- Splashbacks (where suitable)
You may also see spelling variations like litho stone, litestone, and litho stone benchtops. The safest way to confirm what you’re getting is to check the supplier product name, range name, and slab code on the quote or order.
Lithostone Colours: How to Choose with Confidence
Most colour regrets come down to undertone (warm vs cool) and lighting. What looks good in a showroom can appear different at home.
Step 1: Choose Undertone First
- Warm whites / creamy tones: Pair well with timber, brass, and warmer LED lights.
- Cool whites / crisp tones: Suit bright white cabinetry, chrome, and cooler LED lights.
- Greys and concrete looks: Ideal for modern cabinetry and large-format tiles.
- Beige / sand tones: Often work well in coastal-style SEQ homes without looking too yellow.
Always take a sample home to check how it looks:
- In morning light.
- In afternoon light (especially western sun).
- At night under your actual lighting (including under-cabinet LEDs).
- Beside your cabinetry, flooring, and splashback samples.
If you’ve chosen a specific colour, ask about its availability early. Stock can change depending on the batch and supplier.
Step 2: Polished vs Matte (Honed)
The finish is a lifestyle choice as much as a design choice.
| Finish | What You’ll Like | What to Watch |
|---|---|---|
| Polished | Brighter look, reflects light, generally easier to wipe down | Can show reflections/swirls more under certain lighting if cleaned with the wrong cloth |
| Matte / Honed | Softer, more natural look, less glare | Can show fingerprints and oil smears more in high-use areas |
If you cook often, have kids, or use your island as a drop zone, tell us. This helps us match the finish to your real-life use.
Lithostone Benchtops: 20mm vs 40mm Mitred Edges
Both 20mm and 40mm edges can look great. The best choice usually depends on your home’s style, proportions, and budget.
20mm
- Offers a clean, modern profile.
- Often suits smaller kitchens and tighter budgets.
- Works well with thicker splashback tiles or feature hardware.
40mm Look (Mitred Edge)
- Provides a heavier, more architectural look.
- Popular on islands and in larger open-plan kitchens.
- Creates a strong perimeter line.
A 40mm look is a specific cutting and shaping technique, not a thicker stone slab. It needs accurate mitres, strong bonding, and tidy finishing, especially on waterfall ends.
Splashbacks: Full-Height vs Upstands (and Heat)
Stone splashbacks can look sharp, but their suitability depends on your layout, heat zones, and specific detailing.
Upstands (Short Returns)
- Offer practical wall protection behind the benchtop.
- Easier to incorporate around existing windows and power points.
- Often paired with tile or another finish above.
Full-Height Stone Splashbacks
- Create a strong visual impact (especially when matched).
- Require more material and careful handling than upstands.
- Need careful planning around window reveals, power points, and wall straightness.
Heat Near Cooktops
Always follow the appliance manufacturer’s guidance for clearances and suitable materials. If you want stone behind a cooktop, confirm the exact model early so it can be checked.
Joints and Alignment
Good results usually come from:
- Planning joint lines early so they land in less noticeable spots.
- Aligning joints to key features where possible (e.g., window reveals, cooktop centreline).
- Allowing for real wall conditions (older homes can be out of plumb).
Cabinetry Readiness Checklist (So It Fits First Time)
Most benchtop issues start under the stone. If cabinets aren’t level or properly supported, the stone can be forced into a twist, stressing joins and cut-outs.
Before templating and installation, check:
- Cabinets are level, straight, and securely fixed. Stone follows the cabinets; it won’t hide a twist.
- Adequate support at spans and overhangs. Don’t assume stone can span any distance unsupported. Confirm brackets/frames early for breakfast bars.
- Appliance clearances are confirmed. Confirm cooktop and sink specification sheets before the final measure.
- Waterfall end planning is resolved. Confirm finished floor level and skirting details. Decide whether panels run to the floor, sit off the floor, or return to a plinth. Confirm veining direction and corner alignment if relevant.
- Installer access is practical. Clear the carry path from the street to the kitchen. Confirm lift size and booking rules in apartments.
If you’re unsure, send photos at the cabinetry stage. It’s usually easier to fix access or support issues early rather than on installation day.
How to Get an Accurate Quote in SEQ
To price accurately, our stonemasons need enough information to plan pieces, joins, and handling.
Send:
- Plans or cabinet drawings (PDF is fine).
- Appliance spec sheets (sink and cooktop at minimum).
- Suburb + access notes (e.g., stairs, steep driveway, narrow access, lift bookings, parking/loading).
- Photos of installed cabinetry (plus the carry path from entry to kitchen).
- 2–3 colour options (and your preferred finish).
If it’s a Queenslander renovation, an apartment kitchen, or a modern build with a large island, mention that upfront.
Lithostone Pricing Checklist: The Details That Change the Quote
For a faster, more accurate price, include:
- Slab colour (or 2–3 options)
- 20mm vs 40mm mitred edge
- Edge profile type
- Number of pieces and likely seam locations
- Undermount sink cut-out type + sink model
- Cooktop cut-out + cooktop model
- Waterfall ends (none / one / two)
- Splashback scope (none / upstands / full-height)
- Access notes (stairs, lift bookings, long carry)
CTA: Request a quote and attach plans/photos so we can price it properly: https://seqstone.com.au/lithostone/
Lithostone Builders Range: What It Is, Where It Fits, and Lead Times
The Lithostone Builders Range is usually a streamlined selection within Lithostone. It’s designed for projects where availability, repeatability, and predictable scheduling are key.
Typical Applications
- Project homes and volume builds
- Investment properties
- Straightforward renovations with standard detailing
- Kitchens, vanities, and laundries
How It Differs From Other Lithostone Lines
- A tighter set of popular colours (often easier to re-order).
- Typically suits standard finishes and common thickness/detailing.
- Can reduce surprises around stock and lead times.
Availability and Lead Times
Availability depends on supplier stock and batch timing. If you have a handover date, ask to confirm:
- Current stock position for your shortlisted colour(s).
- Expected arrival timing (if ordering).
- The earliest realistic template and install window once cabinetry is ready.
Lithostone vs. Other Engineered Quartz Surfaces: What to Compare
Lithostone is often compared with:
- Caesarstone quartz surfaces
- Smartstone
- Essastone
- Zenith surfaces by Stone Ambassador
Instead of focusing on brand hype, compare what affects your outcome:
- Does the colour/pattern look consistent across slabs?
- Do you want polished or matte/honed, and how does it live day to day?
- Is your chosen colour available within your timeline?
- What’s the seam plan for your layout (especially islands and L-shapes)?
- What edge and waterfall detailing is included?
Quick links:
- Lithostone: https://seqstone.com.au/lithostone/
- Caesarstone®: https://seqstone.com.au/caesarstone/
- Smartstone: https://seqstone.com.au/smartstone/
- Essastone®: https://seqstone.com.au/essastone/
- Full range: https://seqstone.com.au/stone-range/
Gallery Examples (Common SEQ Styles)
If you’re trying to picture a colour in a real home, gallery photos are often more useful than a small sample.
Common SEQ looks:
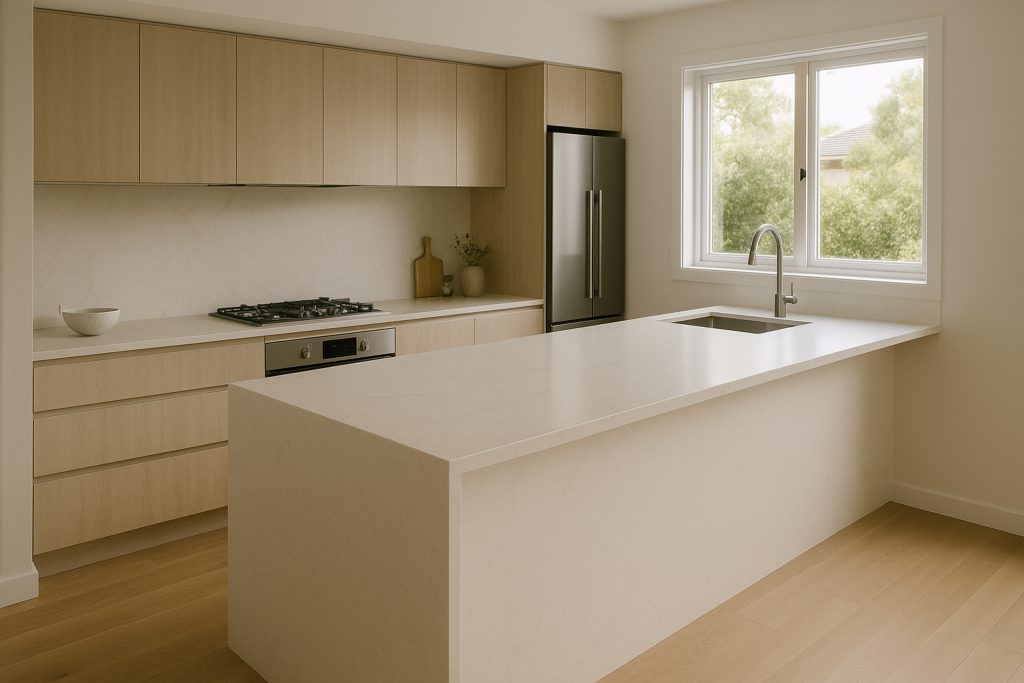
- Coastal white kitchens (soft whites and sand tones with light timber).
- Queenslander renovations (character features with simpler stone patterns).
- Modern new builds (clean lines, larger islands, waterfall ends).
Images are examples only. Stone batches, lighting, and camera settings can change how a surface looks.
Service Area and Site Visit (SEQ Stone)
SEQ Stone services Gold Coast, Brisbane, and surrounding South East Queensland.
If your job needs a site check (e.g., for access, tricky walls, large island pieces, or waterfall detailing), we’ll tell you early. Site conditions affect seam planning, handling, and installation day timing.
Searching “Lithostone Melbourne”?
If you’re outside SEQ (for example, Melbourne), SEQ Stone may not be the right fit for installation.
You can still contact us for general guidance on what to ask a local fabricator. This includes tips on seam planning, access notes, appliance specifications, and what’s usually included in a quote.
Care and Everyday Use (Sealing and Maintenance)
Engineered stone typically doesn’t need sealing like many natural stones. Day-to-day care is mostly simple cleaning plus basic heat protection.
Daily Cleaning: Do
- Wipe with a soft cloth or sponge and warm water.
- Use a mild, pH-neutral detergent when needed.
- Clean spills sooner rather than later (especially oils, wine, coffee, turmeric/spices).
Daily Cleaning: Don’t
- Don’t use abrasive pads or scouring powders.
- Don’t use strong chemicals (e.g., oven cleaner, paint stripper, high-alkaline cleaners).
- Don’t leave chemicals sitting on the surface.
Heat and Impact
- Use a trivet for hot pans, air fryers, and slow cookers.
- Avoid placing very hot cookware directly on the surface.
- Use a chopping board (don’t cut directly on the stone).
If you chip an edge or have a scratch you can feel with a fingernail, raise it early. Repair options depend on where the damage is and how quickly it’s addressed.
Ready to Price Your Lithostone Surface?
For an accurate quote, send:
- Your plan (or cabinet measurements).
- 2–3 preferred Lithostone colours.
- Sink and cooktop models.
- Your address (Gold Coast / Brisbane / SEQ).
- A couple of access photos.
CTA: Get a Lithostone benchtop quote or request a callback here: https://seqstone.com.au/lithostone/
FAQs
Is Lithostone the same as quartz?
Lithostone is an engineered stone surface. Many people call this category engineered quartz. In practical terms, it’s a slab product fabricated to suit kitchens and bathrooms.
Can Lithostone be used for splashbacks?
Yes, where suitable. The right choice depends on your layout and heat zones. Behind some cooktops, you may need to follow the appliance manufacturer’s guidance for clearances and suitability.
20mm vs 40mm—what’s the difference?
20mm is the slab thickness. A 40mm look is usually a mitred edge build-up, which adds visual weight and can suit islands and waterfall ends.
Will I have seams in my benchtop?
Often, yes. Seams are common on L-shapes and long runs, and sometimes on large islands depending on slab size and access. Good seam planning focuses on practical placement and a neat, colour-matched finish.
How long does installation take?
Most installations are completed within a day on site. Timing depends on access, number of pieces, join work, and whether you have waterfalls or full-height splashbacks.
Can I have an undermount sink?
Yes. Confirm the sink model early so the cut-out, edge finish, and cabinet support are all done correctly.